This guide breaks down every type audio interface inputs and outputs you’ll encounter, helping you choose an audio interface that matches your recording needs.

When shopping for an audio interface, the array of input and output options can feel overwhelming. XLR, TRS, ADAT, MIDI – what do these acronyms mean, and which ones do you actually need?
Understanding the Basics: Inputs vs Outputs
Before diving into specific connector types, let’s clarify the fundamental difference:
Inputs
It brings audio signals INTO your audio interface from microphones, instruments, or other audio sources. These signals get converted from analog to digital so your computer can record them.
Outputs
It sends audio FROM your interface to speakers, headphones, or external processors. The interface converts digital audio from your computer back to analog signals.
The number and type of inputs/outputs you need depends entirely on what you’re recording and how you want to monitor your audio.
Microphone Inputs: The Foundation
XLR Inputs
XLR inputs are the gold standard for professional microphones. These three-pin connectors provide several advantages:
- Phantom Power: Most XLR inputs can supply +48V phantom power needed by condenser microphones
- Balanced Connection: Reduces noise and interference over long cable runs
- Professional Standard: Works with virtually all studio microphones
👌 Who needs XLR inputs: Anyone recording vocals, acoustic instruments with condenser mics, or building a professional studio setup. Most home studio owners need at least 1-2 XLR inputs.
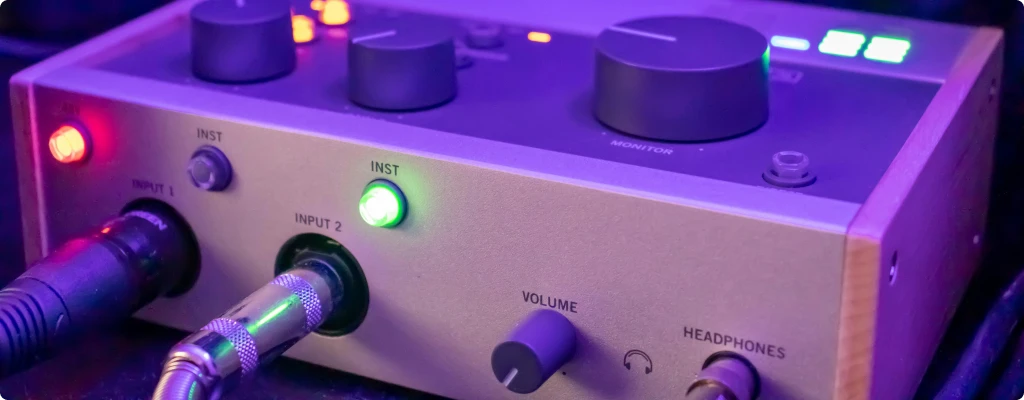
Combo Inputs (XLR/TRS)
Many modern interfaces feature combo jacks that accept both XLR and 1/4″ TRS plugs in the same port. This versatility is incredibly practical for home studios.
Advantages:
- Space-efficient design
- Can handle microphones OR line-level instruments
- Often include instrument-level switching for guitars/basses
🎯 Best for: Solo artists, podcasters, and small home studios where flexibility matters more than having dedicated input types.
Instrument Inputs: Direct Connection
Hi-Z (High Impedance) Inputs
These specialized inputs are designed for electric guitars, basses, and other high-impedance instruments that need to plug in directly.
Why they matter: Regular line inputs can make guitars sound thin and lifeless. Hi-Z inputs preserve the natural tone and signal strength of electric instruments.
Recognition: Usually labeled as “INST,” “Hi-Z,” or have a guitar symbol. Often combined with combo XLR/TRS jacks.
DI (Direct Input) Considerations
👉 DI (Direct Input) Considerations: Some interfaces include built-in DI functionality, while others require external DI boxes for certain instruments like keyboards or active basses.
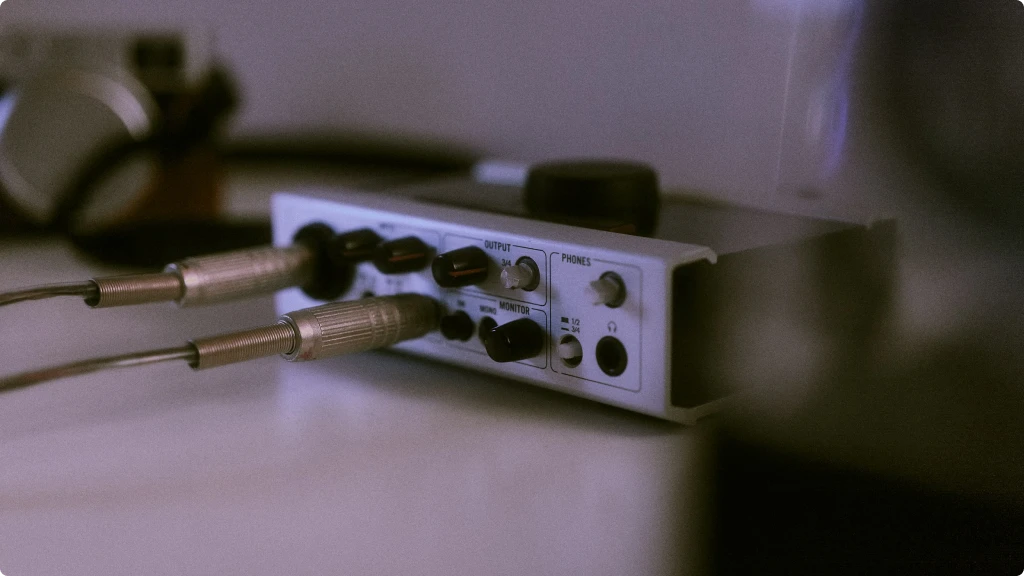
Line Level Inputs and Outputs
TRS (Tip-Ring-Sleeve) 1/4" Connections
These balanced connections are the workhorses of professional audio:
Line Inputs
Accept signals from synthesizers, drum machines, preamps, or other audio equipment
Line Outputs: Send audio to studio monitors, headphone amplifiers, or external processors.
Balanced vs Unbalanced
TRS connections are balanced (quieter, more professional), while TS (no ring) connections are unbalanced but still common for instruments.
RCA Connections
Found on some budget and prosumer interfaces, RCA (red/white) connections are familiar from home stereo equipment.
🔈 Common uses: Connecting consumer devices, some synthesizers, or budget studio monitors. The limitations is that it’s an unbalanced connection, more susceptible to noise than professional alternatives.
Digital Expansion Options
ADAT Optical
- What it does: Adds 8 additional inputs/outputs through a single optical cable.
- Requirements: You need an external preamp with ADAT output (like the Focusrite Clarett+ 4Pre).
- Who benefits: Studios that need to record multiple instruments simultaneously, like full drum kits or live bands.
ADAT (Alesis Digital Audio Tape) optical connections can expand your input count dramatically.
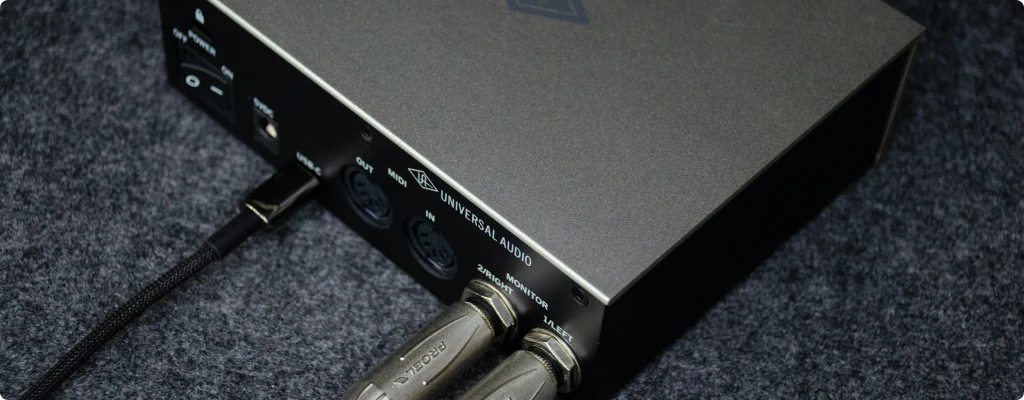
MIDI: The Control Connection
MIDI inputs and outputs don’t carry audio – they transmit performance data like note information, timing, and control messages.
- MIDI In: Receives data from keyboards, controllers, or other MIDI devices.
- MIDI Out: Sends data to external synthesizers, drum machines, or other MIDI equipment.
- MIDI Thru: Passes MIDI data through to additional devices in a chain.
💡 Modern consideration: Many current devices use USB for MIDI, making dedicated MIDI ports less critical than they once were.
S/PDIF (Coaxial and Optical)
S/PDIF provides stereo digital input/output, commonly used for:
- Connecting digital mixers
- Interfacing with some keyboards and samplers
- Digital audio transfer between devices
Headphone and Monitor Outputs
Dedicated Headphone Outputs
Quality headphone outputs include:
- Independent volume control: Separate from main monitor volume
- Sufficient power: Drives high-impedance studio headphones properly
- Low noise floor: Critical for detailed monitoring during recording
Main Monitor Outputs
These feed your studio monitors and typically offer:
- Volume control: Often with a large, easily accessible knob
- Balanced connections: Usually TRS or XLR for professional monitors
- Multiple output options: Some interfaces provide both TRS and RCA monitor outs
How Many Inputs Do You Really Need?
This is the most common question when choosing an interface. Here’s a practical breakdown:
Solo Artist/Podcaster: 1-2 inputs (usually combo XLR/TRS)
- Record one microphone or instrument at a time
- Overdub additional parts in separate passes
Small Band/Duo: 4-8 inputs
- Record drums (4-6 mics), bass, and guitar simultaneously
- Capture live performances with minimal overdubs
Full Production Studio: 8+ inputs
- Record complete drum kits (8-12 mics is common)
- Capture live bands in real-time
- Multiple musicians recording simultaneously
💵 Consider future needs: It’s often worth buying slightly more inputs than you currently need, as expanding later usually means buying a completely new interface.
Digital Expansion Options
ADAT Optical
- What it does: Adds 8 additional inputs/outputs through a single optical cable.
- Requirements: You need an external preamp with ADAT output (like the Focusrite Clarett+ 4Pre).
- Who benefits: Studios that need to record multiple instruments simultaneously, like full drum kits or live bands.
ADAT (Alesis Digital Audio Tape) optical connections can expand your input count dramatically.
MIDI: The Control Connection
MIDI inputs and outputs don’t carry audio – they transmit performance data like note information, timing, and control messages.
- MIDI In: Receives data from keyboards, controllers, or other MIDI devices.
- MIDI Out: Sends data to external synthesizers, drum machines, or other MIDI equipment.
- MIDI Thru: Passes MIDI data through to additional devices in a chain.
💡 Modern consideration: Many current devices use USB for MIDI, making dedicated MIDI ports less critical than they once were.
S/PDIF (Coaxial and Optical)
S/PDIF provides stereo digital input/output, commonly used for:
- Connecting digital mixers
- Interfacing with some keyboards and samplers
- Digital audio transfer between devices
Headphone and Monitor Outputs
Dedicated Headphone Outputs
Quality headphone outputs include:
- Independent volume control: Separate from main monitor volume
- Sufficient power: Drives high-impedance studio headphones properly
- Low noise floor: Critical for detailed monitoring during recording
Main Monitor Outputs
These feed your studio monitors and typically offer:
- Volume control: Often with a large, easily accessible knob
- Balanced connections: Usually TRS or XLR for professional monitors
- Multiple output options: Some interfaces provide both TRS and RCA monitor outs
How Many Inputs Do You Really Need?
This is the most common question when choosing an interface. Here’s a practical breakdown:
Solo Artist/Podcaster: 1-2 inputs (usually combo XLR/TRS)
- Record one microphone or instrument at a time
- Overdub additional parts in separate passes
Small Band/Duo: 4-8 inputs
- Record drums (4-6 mics), bass, and guitar simultaneously
- Capture live performances with minimal overdubs
Full Production Studio: 8+ inputs
- Record complete drum kits (8-12 mics is common)
- Capture live bands in real-time
- Multiple musicians recording simultaneously
💵 Consider future needs: It’s often worth buying slightly more inputs than you currently need, as expanding later usually means buying a completely new interface.
Matching Outputs to Your Monitoring Setup
Studio Monitor Considerations
- Powered monitors: Need line-level outputs from your interface.
- Passive monitors: Require a separate power amplifier.
- Multiple monitor sets: Some interfaces offer A/B speaker switching.
Headphone Distribution
If multiple people need to monitor during recording:
- Multiple headphone outputs: Some interfaces include 2-4 headphone jacks.
- Headphone amplifiers: External units can distribute headphone feeds.
- Individual mix control: Higher-end interfaces allow separate headphone mixes.
Special Features to Consider
Loopback Functionality
Allows you to route computer playback back into recording software – essential for:
- Podcast interviews with remote guests.
- Recording streaming audio.
- Creating tutorial content with computer audio.
Talkback Features
Built-in communication system for producer-to-artist communication during recording sessions.
Word Clock In/Out
Synchronization connections for larger, more complex studio setups with multiple digital devices.
Making Your Decision: Questions to Ask
Before choosing an interface, honestly assess your needs:
- What are you recording? Solo vocals, full bands, podcasts, or electronic music?
- How many sources simultaneously? This determines your minimum input count
- What monitoring setup? Powered speakers, headphones, or both?
- Future expansion plans? Will you need more inputs later?
- Budget constraints? More inputs and outputs typically mean higher costs.
Common Mistakes to Avoid
- Over-buying inputs: Don’t pay for 16 inputs if you’ll never use more than 4.
- Under-buying quality: Cheap interfaces with many inputs often compromise on preamp quality.
- Ignoring monitoring: Great inputs are useless if you can’t properly hear what you’re recording.
- Forgetting phantom power: Ensure XLR inputs provide phantom power for condenser mics.
- Overlooking impedance: Make sure you have proper Hi-Z inputs for direct guitar recording.
Conclusion: Choose Based on Your Actual Needs
The perfect audio interface provides exactly the inputs and outputs you need without unnecessary extras that inflate the price. A solo artist might thrive with a simple 2-input interface, while a band needs 8+ inputs for simultaneous recording.
Focus on getting quality inputs and outputs that match your current workflow, with modest room for growth. Remember: you can always upgrade later as your needs evolve, but you’ll use your interface every time you record – make sure it serves your actual recording process, not some theoretical future scenario.
The key is honest self-assessment of your recording habits and choosing an interface that makes your creative process smooth and enjoyable, rather than getting caught up in spec sheets and features you’ll never use.
| ALSO REVIEWED

Bassist, guitarist and producer with a long history in bands, I’ve spent more than 20 years immersed in music and gear. When I’m not playing, I’m writing about audio music, studio setups, recording and everything that helps musicians sound their best.