Best Audio Interface for Streaming: 7 Tested Picks (2026)
- Audio Interface, Buying Guides
- by Bruno Bontempo
Find the best audio interface for streaming in this guide. Learn tips, settings, and steps to optimize your setup for quality audio and seamless streaming.
Our articles may include affiliate links and we may earn a commission. Here how it works.
Finding the right audio interface for streaming shouldn’t feel like decoding a tech manual. After setting up different streaming configurations—from solo gaming streams to multi-guest podcast setups—I’ve narrowed down what actually matters for streamers: clean audio, simple routing, and controls you can reach without leaving your game.
Most streamers don’t need a traditional studio interface. You need something built around live broadcasting: volume faders you can adjust mid-stream, effects you can trigger instantly, and the ability to mix multiple audio sources without fumbling through software. Some of these interfaces even include sound pads for intro music or meme drops, which has become essential for modern streaming.
The streaming audio interface market has evolved significantly. Therefore, manufacturers now design gear specifically for content creators rather than just adapting studio equipment. This means features like hardware mute buttons, dedicated headphone mixes, and built-in voice processing that doesn’t require plugins.
| QUICK OVERVIEW
Top Pick Overall
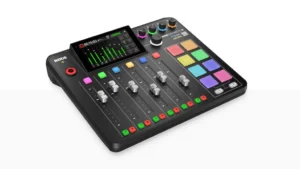
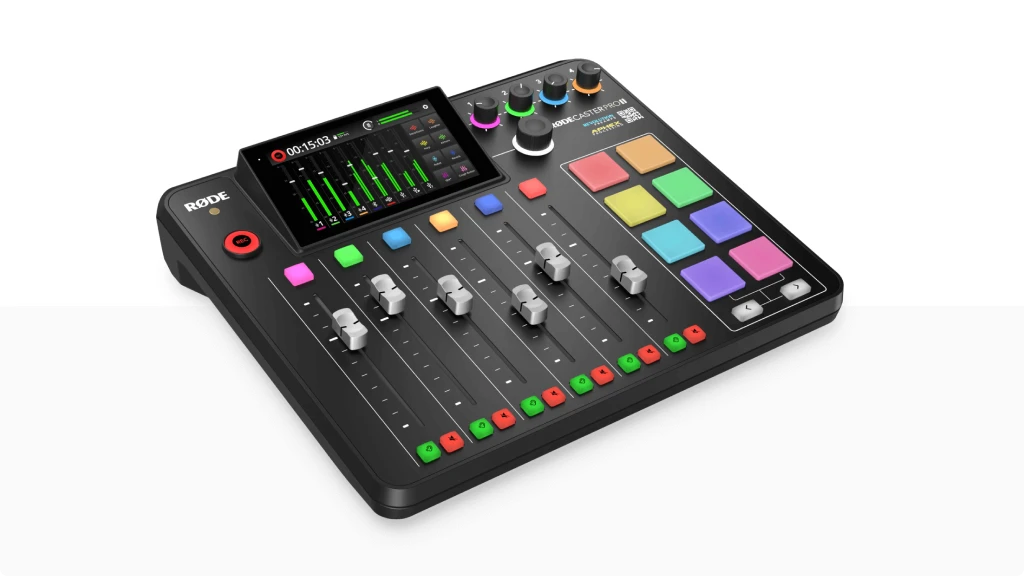
RØDECaster Pro II
4.9
The RØDECaster Pro II dominates if you’re serious about streaming or podcasting with multiple people. Each of the four mic channels has dedicated processing—compression, EQ, noise gate, and de-esser. Above all, the pads feel responsive and never miss a trigger, even during rapid-fire presses.
| Key Features
- Inputs: 4 XLR mic inputs with APHEX processing
- Outputs: Dual headphone outputs, USB-C, Bluetooth
- Resolution: 24-bit/48kHz
- Compatibility: Windows, macOS, iOS, Android
- Connectivity: USB-C, Bluetooth 5.0
- Plus: 8 sound pads per bank, SMART pads for phone calls
| Buy if
- Multi-host podcasts or streams
- Multi-host podcasts or streams
- Streamers who want instant sound effects
- Interview-style content with remote guests
- Anyone needing separate headphone mixes for each person
| Avoid if
- Solo streamers on a tight budget
- Musicians needing high input counts
- Users wanting a compact desktop footprint
Overview: The RØDECaster Pro II represents RØDE’s second generation of streaming mixers, and the improvements justify the “Pro” label. The original model handled four mics well, but this version adds better preamps, more processing power, and significantly improved software integration.
Audio quality from the APHEX-licensed preamps sounds broadcast-ready. When I tested it with a Shure SM7B—a notoriously gain-hungry microphone—the RØDECaster delivered plenty of clean amplification without any noise. Furthermore, the built-in processing actually works. The compressor adds presence without making voices sound squashed, and the noise gate effectively cuts room noise without chopping off word endings.
The physical workflow deserves special mention. Each fader controls one microphone, and the corresponding button beneath mutes that channel. This layout becomes second nature within minutes. Additionally, pressing any fader brings up its settings on the touchscreen, so adjusting a guest’s EQ takes seconds.
Routing flexibility exceeds what most streamers need, which means it’ll grow with your channel. You can send different mixes to different outputs. For instance, your stream gets everyone’s voice plus sound effects, but your recording might be each person on separate tracks for editing. Similarly, each headphone output can have its own mix, which prevents guests from hearing echo or monitoring signals they don’t need.
The Bluetooth input proved more useful than expected. You can take phone calls directly through the unit, with the caller appearing on a dedicated sound pad. Therefore, interviewing someone via phone becomes seamless—they hear your questions clearly, you hear them through your headphones, and your audience gets the clean mix.
Best Value
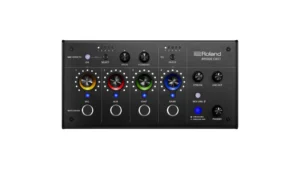
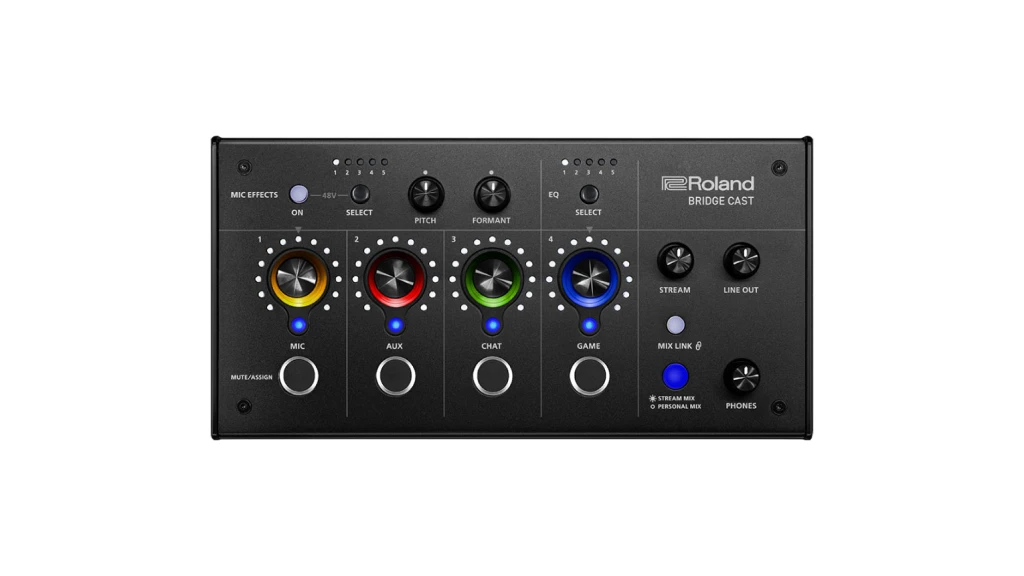
Roland BRIDGE CAST
4.8
Roland’s BRIDGE CAST targets solo streamers and dual-PC setups with surgical precision. The interface doesn’t try to be everything; instead, it excels at routing multiple audio sources cleanly. The dual-bus system forms the core advantage. One USB-C connection handles your gaming PC, while the second handles your streaming PC.
| Key Features
- Inputs: 1 XLR mic input, 2 USB-C connections
- Outputs: Stereo line out, headphone output
- Resolution: 24-bit/96kHz
- Compatibility: Windows, macOS
- Connectivity: Dual USB-C (separate PC connections)
- Plus: Voice effects, trigger pads, streaming software integration
| Buy if
- Solo game streamers
- Dual-PC streaming setups
- Users who want simple but effective routing
- Streamers needing voice effects (pitch shift, megaphone, robot)
- Anyone moving from USB mics to XLR
| Avoid if
- Multi-guest streams (only one mic input)
- Users needing MIDI functionality
Overview: Roland builds professional audio gear, and that expertise shows in the BRIDGE CAST’s design. The unit feels substantial on your desk—not cheap or plasticky. Knobs have proper resistance, and the faders move smoothly without wobbling.
Audio performance meets expectations for this price point. The single mic preamp provides clean gain with minimal noise. When I tested it with an Audio-Technica AT2020 condenser microphone, the preamp delivered enough clean power without any audible hiss. However, gain-hungry dynamic mics like the Shure SM7B might need a cloud-lifter or inline preamp for optimal levels.
The dual-bus system really shines in practice. On my streaming PC, I run OBS and Discord. On my gaming PC, I run the game. The BRIDGE CAST lets me send game audio and my voice to the stream, but my Discord partners only hear my voice—not game audio. Similarly, I can play music on my streaming PC that goes to my headphones but not to Discord. This granular control usually requires virtual audio cables or complex software routing, but the BRIDGE CAST handles it in hardware.
Voice effects add personality to streams without external plugins. The BRIDGE CAST includes preset effects like “Radio,” “Monster,” “Echo,” and “Pitch.” While these won’t replace professional vocal processors, they work for comedic moments or character voices. Moreover, you can save custom effect settings and trigger them via the buttons.
The streaming software integration deserves mention. Roland includes companion software that connects to OBS, letting you trigger scenes using the hardware buttons. For instance, pressing pad 1 might switch your stream to “Starting Soon” while pad 2 goes to “Gameplay.” This integration removes one more reason to touch your keyboard mid-stream.
Best for Multi-Streaming
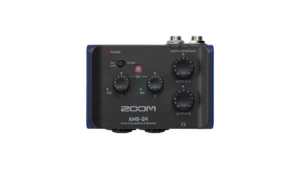
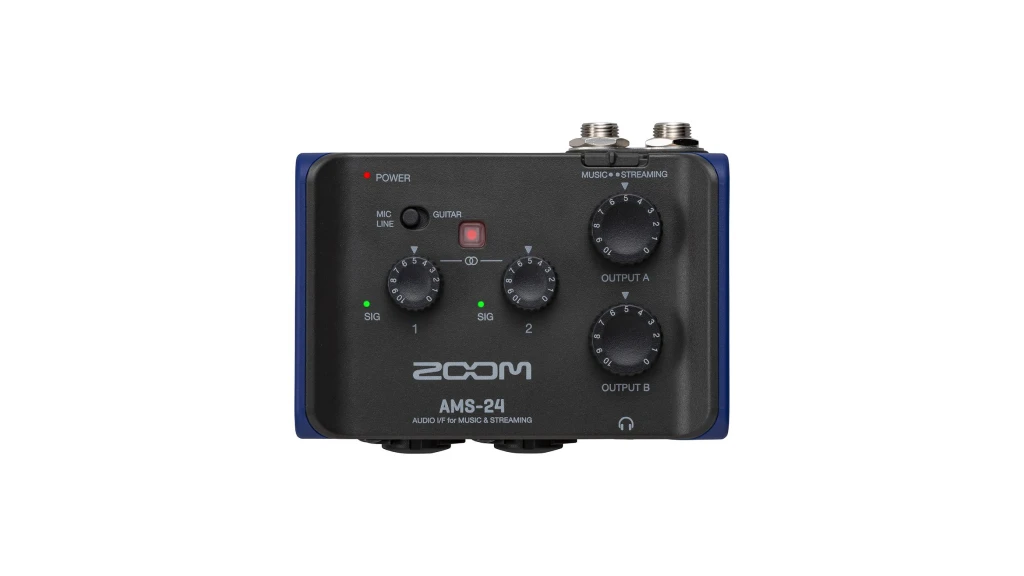
Zoom AMS-24
4.7
The Zoom AMS-24 bridges the gap between simple streaming interfaces and professional mixing consoles. If you’re streaming with multiple guests, running complex audio setups, or broadcasting to multiple platforms simultaneously, the AMS-24 provides the routing flexibility you need.
| Key Features
- Inputs: 4 XLR/TRS combo, 4 TRS line inputs
- Outputs: 4 stereo line outputs, 2 headphone outputs
- Resolution: 24-bit/48kHz
- Compatibility: Windows, macOS, iOS
- Connectivity: USB-C
- Plus: 4 independent stereo buses, dedicated DSP mixer
| Buy if
- Streaming to multiple platforms simultaneously
- Podcasts with three or more people
- Educational streams requiring separate audio sources
- Musicians performing live while streaming
- Users transitioning from physical mixers to interfaces
| Avoid if
- Beginners wanting plug-and-play simplicity
- Solo streamers with basic needs
- Budget-conscious users
Overview: Zoom has built professional recorders and interfaces for years, and the AMS-24 inherits that reliability. The unit feels professional—solid metal construction with smooth faders and responsive knobs. It occupies significant desk space, so measure before buying.
Input quality impressed me across all eight channels. When testing with four dynamic microphones simultaneously for a group podcast, each channel delivered clean, consistent gain. The preamps handle both condenser and dynamic mics well, though extremely gain-hungry mics like the Shure SM7B might benefit from additional amplification.
The mixer section operates independently from your computer. This means you can adjust levels, apply EQ, and create monitor mixes without loading your CPU. Moreover, the AMS-24 remembers your settings even after power cycling. Each input channel includes a three-band EQ, high-pass filter, and compressor—essential tools for polishing raw microphone signals.
Where the AMS-24 truly excels is its four-bus routing system. Each bus appears as a separate stereo input in your computer. Therefore, you might use Bus 1 for OBS, Bus 2 for your recording software, Bus 3 for Discord, and Bus 4 for monitoring. Each bus can contain different combinations of your eight inputs at different levels.
The practical application becomes clear when streaming complex events. For example, you might be hosting a live music performance while streaming it. Bus 1 sends the full mix (music + commentary) to your stream. Bus 2 sends only the commentary to your remote guests on Zoom. Bus 3 provides a different mix back to the musicians for monitoring. This flexibility typically requires expensive broadcasting equipment, but the AMS-24 delivers it in a compact interface.
The learning curve exists—I spent an hour with the manual understanding the routing system. However, once configured, the AMS-24 becomes intuitive. Zoom includes companion software for creating presets, so you can save different routing configurations for different stream types.
Musician Streamers
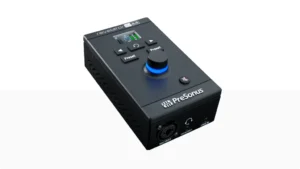
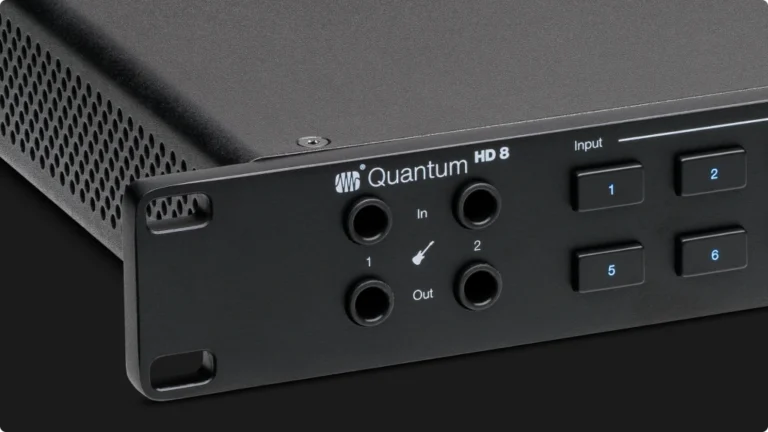
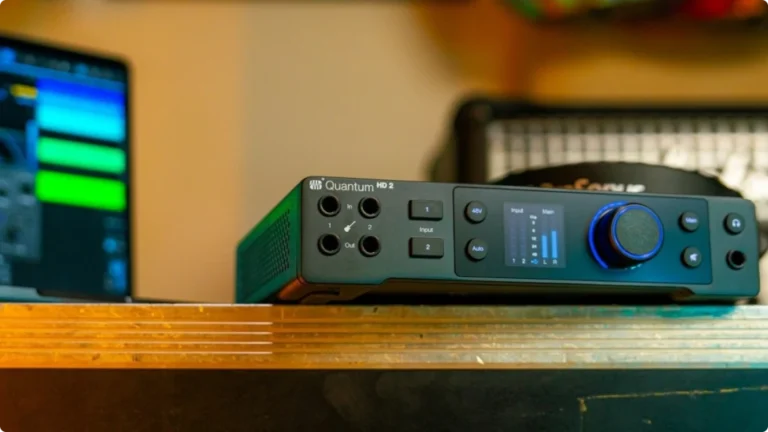
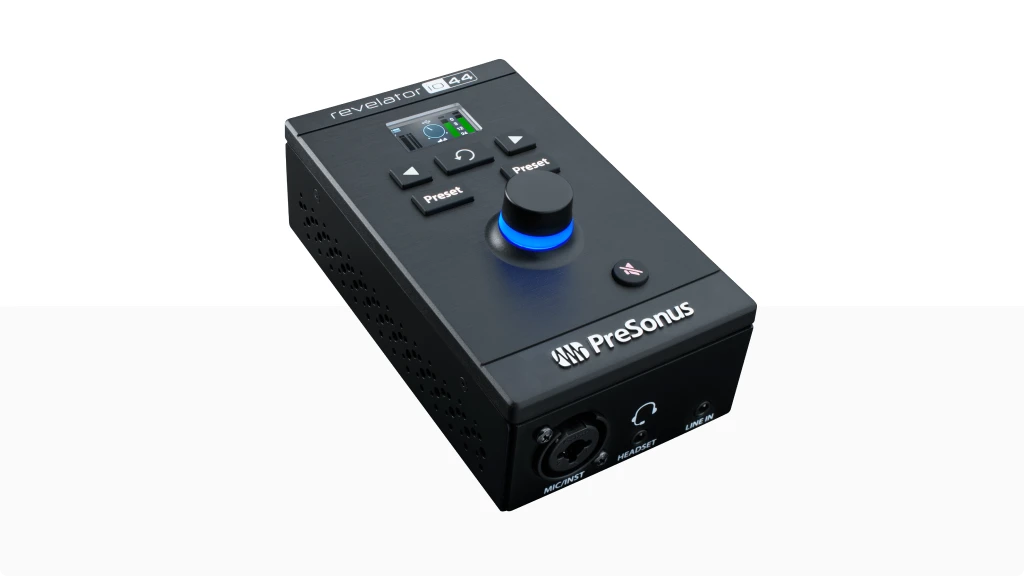
PreSonus Revelator io44
4.5
PreSonus approaches streaming from a studio perspective. The Revelator io44 functions as a full-featured recording interface that happens to excel at streaming. If you’re a musician who also streams—say, a guitarist creating tutorial content or a producer demonstrating beatmaking—this interface bridges both worlds effectively.
| Key Features
- Inputs: 2 XLR mic inputs, 2 TRS line/instrument inputs
- Outputs: Balanced line and 1 headphone output
- Resolution: 24-bit/96kHz
- Compatibility: Windows, macOS, iOS (with USB-C to Lightning adapter)
- Connectivity: USB-C
- Plus: MIDI I/O, loopback recording, Fat Channel processing, Studio One Artist included
| Buy if
- Musicians who stream performances or tutorials
- Producers creating content about music production
- Multi-instrumentalists needing flexible routing
- <Content requiring simultaneous voice and instrument recording
- Users wanting professional DAW software included
| Avoid if
- Voice-only streams (overpaying for features you won't use)
- Anyone needing hardware sound pads or effects buttons
Overview: PreSonus has established themselves in the professional audio market, and the Revelator io44 demonstrates that expertise. The interface feels solid and professional—metal chassis with smooth knobs that provide tactile feedback. The front panel includes gain controls for all four inputs, phantom power switches, and a large monitor volume knob.
Audio quality matches interfaces twice its price. The XMAX-L preamps deliver 50dB of gain with minimal noise. When testing with both condenser and dynamic microphones, the io44 captured detailed, accurate audio. The converters preserve high-frequency detail that distinguishes professional recordings from amateur ones.
Fat Channel processing provides broadcast-quality voice processing without external plugins. This PreSonus technology includes compression, EQ, and limiting designed to make voices sound radio-ready. During testing for podcast recording, I enabled Fat Channel processing on the host microphone. The result sounded polished and professional without sounding over-processed. Moreover, these effects process in real-time without adding latency, so they work perfectly for live streaming.
Loopback functionality enables you to capture your computer’s audio directly into the interface. This feature proves essential for streaming, allowing you to record desktop audio, music playback, or sounds from other applications. The io44 implements loopback intelligently—you can enable or disable it per channel, giving you precise control over what gets captured.
MIDI connectivity expands creative possibilities. If you’re a keyboardist streaming performances, you can connect your MIDI controller directly to the io44. The interface passes MIDI data to your computer, eliminating the need for separate MIDI interfaces. Additionally, MIDI output enables you to control external synthesizers or drum machines during your stream.
The Universal Control software provides detailed mixing and routing options. You can create custom monitor mixes, adjust buffer sizes for minimal latency, and configure the loopback routing. While the software requires some learning, it offers flexibility that simpler streaming interfaces can’t match.
Studio One Artist represents significant added value. This isn’t a stripped-down demo—it’s a fully functional DAW capable of professional recording and mixing. If you plan to record content for editing before uploading, Studio One provides everything you need. The software includes virtual instruments, effects plugins, and unlimited track count.
Voice-Focused Streams
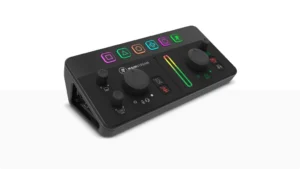
Mackie MainStream
4.6
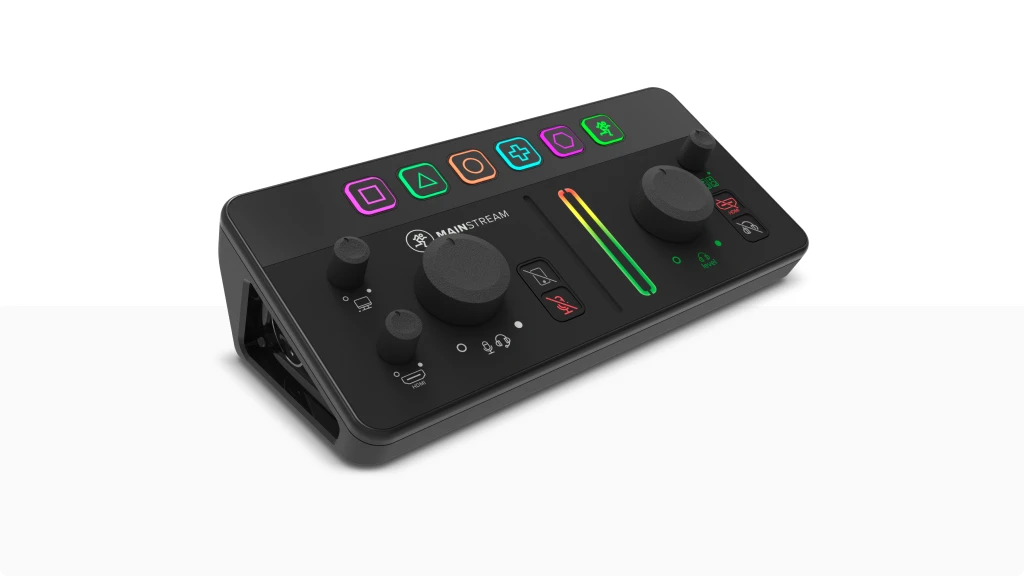
Mackie’s MainStream targets talk-based streams—podcasts, commentary, reaction content, or anything where your voice carries the content. The interface doesn’t include sound pads or extensive mixing features. Instead, it focuses on making your voice sound as good as possible through built-in processing and intuitive controls.
| Key Features
- Inputs: 1 XLR mic input with 60dB gain
- Outputs: Balanced line and 1 headphone output
- Resolution: 24-bit/48kHz
- Compatibility: Windows, macOS
- Connectivity: USB-C
- Plus: Soundset vocal processing, cough button, loopback mixing, free software bundle
| Buy if
- Podcast streamers focusing on conversation
- Commentary and reaction streamers
- Educational content creators
- Solo streamers wanting better vocal sound without learning processing
- Users upgrading from basic USB microphones
| Avoid if
- Multi-person streams (single input)
- Streamers wanting hardware sound effects pads
- Musicians needing instrument inputs
Overview: Mackie has manufactured mixing consoles and audio interfaces for decades, and that experience informs the MainStream’s design. The unit feels professional despite its compact size. Controls operate smoothly with appropriate resistance, and the LED indicators provide clear status information.
The single XLR input provides 60dB of gain, which handles most broadcast microphones effectively. When testing with a Shure SM7B—a microphone notorious for requiring substantial amplification—the MainStream provided acceptable levels though not quite as clean as interfaces with 70dB+ of gain like the Focusrite Clarett+ 4Pre. For typical streaming mics like the Shure SM58 or Audio-Technica AT2020, the preamp performs excellently.
Soundset processing distinguishes the MainStream from basic interfaces. Mackie offers three preset modes: “Neutral” provides light processing, “Warm” adds bass and compression for richer voices, and “Bright” emphasizes high frequencies for clarity. Each preset applies multiple effects—compression, EQ, limiting, and de-essing—in appropriate proportions.
During testing, I found the “Warm” preset most useful for general streaming. It added vocal presence without making speech sound obviously processed. The compression helped even out volume variations between quiet and loud words, while the de-esser reduced harsh “S” sounds. Importantly, these effects process with imperceptible latency, so your monitoring remains natural.
The cough button proves more useful than expected. Unlike the mute button, which requires pressing twice (once to mute, once to unmute), the cough button only mutes while you hold it down. This makes it perfect for quick interruptions—a cough, sneeze, or brief pause to take a drink—without breaking your flow or forgetting to unmute.
Loopback functionality enables clean mixing of desktop audio into your stream. The MainStream includes a dedicated knob for controlling loopback level, which simplifies balancing music or game audio against your voice. Additionally, Mackie implements loopback smartly—it only sends to your streaming software, not back to your headphones, preventing echo issues.
Mackie bundles several software packages with the MainStream: Waveform OEM (a complete DAW for recording), several virtual instruments, and effects plugins. While these extras don’t directly affect streaming, they add value if you plan to edit content or record music.
The MainStream’s limitations are its strengths in disguise. By focusing on single-microphone voice streaming, Mackie created an interface that excels at that specific task. There’s no learning curve, no complex routing, and no features you’ll never use. You connect your mic, enable Soundset processing, and start streaming with professional vocal sound.
Mobile Streaming
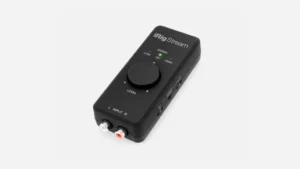
IK Multimedia iRig Stream
4.5
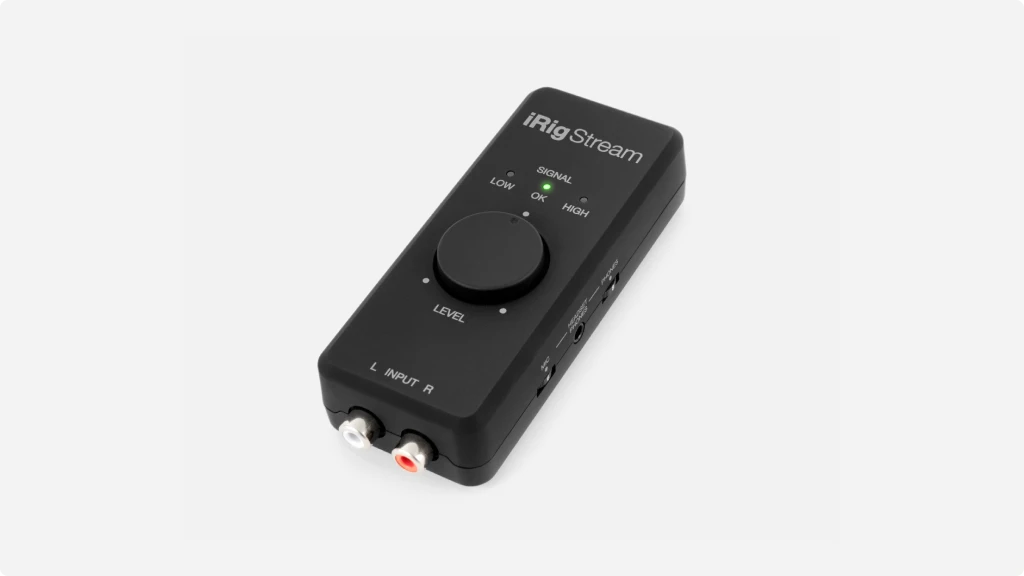
The iRig Stream proves you don’t need expensive gear to start streaming with quality audio. IK Multimedia designed this interface for mobile creators, but it works equally well for desktop streaming on a budget. The compact size makes it genuinely portable—small enough to fit in a jacket pocket.
| Key Features
- Inputs: 2 combo XLR/TRS inputs
- Outputs: Balanced line and 1 headphone output
- Resolution: 24-bit/192kHz
- Compatibility: iOS, Android, Windows, macOS
- Connectivity: USB-C, Lightning (with adapter)
- Plus: Loopback audio, compact portable design, bus powered
| Buy if
- Mobile streaming from phones or tablets
- Beginner streamers testing before investing heavily
- Travel content creators
- Podcasters recording on location
- Backup interface for streamers with primary setups
| Avoid if
- Users needing more than two inputs
- Streamers wanting hardware controls or effects
- Professional broadcasts requiring extensive routing
Overview: IK Multimedia specializes in mobile audio solutions, and that expertise shows in the iRig Stream’s design. The unit measures barely four inches long, making it one of the smallest audio interfaces available. Despite the compact size, it feels sturdy—not like a toy. The aluminum chassis dissipates heat effectively, and the knobs provide firm resistance.
Both inputs offer switchable phantom power for condenser microphones. When testing with an Audio-Technica AT2020, the iRig Stream delivered clean audio comparable to interfaces costing significantly more. The preamps provide 60dB of gain, which suffices for most microphones except extremely quiet dynamics like ribbon mics.
Audio quality exceeds expectations for this price point. The converters support up to 24-bit/192kHz, though most streaming uses 48kHz. Still, having high-resolution capability means the interface won’t become a bottleneck if you also use it for music recording. Frequency response sounds flat and honest—the interface doesn’t color your audio, which gives you clean material for processing.
Monitoring through the headphone output works without noticeable latency. You hear yourself in real-time, which feels natural when speaking or singing. The headphone amp provides adequate power for typical streaming headphones, though audiophile-grade high-impedance headphones might sound slightly underpowered.
Loopback functionality enables you to capture computer audio along with your microphone. This feature, often missing from budget interfaces, makes the iRig Stream genuinely useful for streaming. You can play music, game audio, or other desktop sounds that get mixed with your voice into your stream.
Mobile compatibility represents a key advantage. The iRig Stream works with iPhones, iPads, and Android devices through USB-C or Lightning connections. For mobile streamers using platforms like Instagram Live or TikTok Live, this compatibility eliminates the need for complex adapters or workarounds. The interface draws power from your device, though streaming extended sessions with phantom power enabled will drain phone batteries faster.
IK Multimedia includes their T-RackS audio processing software, which provides professional mixing and mastering tools. While you probably won’t use T-RackS for live streaming, it adds value if you edit recorded content before uploading. The software includes EQ, compression, limiting, and various vintage-style effects processors.
The main limitation is input count. Two inputs works for solo streams or simple podcasts, but multi-guest shows require more connections. However, for the target audience—beginner streamers or mobile creators—two inputs usually suffices.
Comparison Table
| Product | Category | Inputs | Outputs | Resolution | Plus |
|---|---|---|---|---|---|
| RØDE RØDECaster Pro II | TOP PICK – Best Overall | 4 XLR | 4 HP + XLR | 24-bit/48kHz | 8 sound pads, touchscreen, APHEX processing, Bluetooth |
| Roland BRIDGE CAST | Best Value | 1 XLR/TRS | 1 HP + stereo | 24-bit/96kHz | Dual USB-C, 8 trigger pads, voice FX, OBS integration |
| Zoom AMS-24 | Best Multi-Streaming | 8 (4 XLR + 4 TRS) | 2 HP + 4 buses | 24-bit/48kHz | 4 stereo buses, 8-channel mixer, DSP per channel |
| PreSonus Revelator io44 | Best for Musicians | 4 (2 XLR + 2 line) | 1 HP + stereo | 24-bit/96kHz | MIDI I/O, Fat Channel processing, Studio One Artist DAW |
| IK Multimedia iRig Stream | Best Budget Option | 2 XLR/TRS | 1 HP | 24-bit/192kHz | Mobile compatible (iOS/Android), ultra-portable, bus powered |
| Mackie MainStream | Best Voice-Focused | 1 XLR | 1 HP + stereo | 24-bit/48kHz | Soundset vocal processing, cough button, Waveform OEM DAW |
What Makes a Great Streaming Audio Interface
Hardware Controls You Can Actually Reach
Software mixers are fine for recording, but streaming requires instant adjustments. Most importantly, you need physical controls for mic gain, headphone volume, and a hardware mute button. I’ve seen countless streams ruined because someone couldn’t find their software mute fast enough.
The best streaming interfaces put essential controls on the front panel. For instance, having dedicated faders for game audio versus chat audio means you can balance your mix without alt-tabbing. This becomes critical during intense gaming moments or when you need to quickly adjust a guest’s volume.
Multiple Audio Buses for Complex Routing
Here’s something many beginners overlook: you need separate audio buses. One bus sends your complete mix to your stream (game + voice + music). Meanwhile, another bus goes to your headphones, which might only have voice and game audio—no music. This dual-bus routing prevents you from hearing your own intro music while your audience does.
Traditional studio interfaces rarely offer this feature. However, streaming-specific interfaces build it into their core design. Moreover, some include virtual audio routing software that creates additional buses for different platforms.
Built-in Voice Processing
Clean vocal audio separates amateur streams from professional ones. Consequently, many streaming interfaces now include built-in compression, EQ, and de-essing. These processors work in real-time without computer resources, which matters when you’re already running a game and streaming software simultaneously.
That said, onboard processing varies wildly. Some interfaces offer simple presets (“warm,” “bright,” “broadcast”), while others provide detailed parameter controls. In addition, the best ones include noise gates to eliminate keyboard clacking and room noise between words.
Loopback and Virtual Audio
Loopback functionality captures your computer’s audio output back into the interface. This feature enables you to stream desktop audio, music from Spotify, or sounds from Discord without virtual audio cables. Similarly, some interfaces create virtual channels that appear as separate devices in your streaming software.
The Focusrite Scarlett 2i2 includes a basic loopback function, but streaming interfaces take this further. For example, they might offer multiple loopback channels with independent volume controls, giving you precise control over every audio source in your stream.
Setting Up Your Streaming Audio Interface for Success
Optimal Gain Staging Prevents Audio Problems
Most streaming audio issues stem from incorrect gain settings. Set your gain too low, and you’ll introduce noise when boosting volume later. Set it too high, and your audio distorts during loud moments. The goal is finding the sweet spot where your voice peaks around -12dB to -6dB in your streaming software.
Start with your microphone gain at its lowest position. Begin speaking at your normal streaming volume while slowly increasing gain until your audio meters show consistent activity. You want your levels hitting the middle range—not barely moving and not constantly pushing toward the red. This approach ensures clean audio with headroom for unexpected volume spikes.
Most streaming interfaces include LED indicators showing input level. Green usually means good, yellow means approaching maximum, and red indicates clipping. Therefore, you should speak loudly—simulate yelling or laughing—and verify that you occasionally touch yellow but never hit red consistently.
Monitor Mix vs Stream Mix Understanding
This concept confuses new streamers, but it’s simpler than it sounds. Your monitor mix is what you hear in your headphones. Your stream mix is what your audience hears. These should usually differ.
For example, you might want to hear your voice louder in your headphones so you can monitor your delivery. However, your stream should have your voice balanced with game audio. Similarly, you might include a metronome or guide track in your monitor mix that never goes to the stream. Quality streaming interfaces enable these separate mixes through either hardware controls or companion software.
The practical benefit becomes clear when playing music before your stream starts. You can hear the intro music in your headphones to time your entrance, but you can set it lower in the stream mix so it doesn’t overpower your greeting. Without separate mixes, everyone hears the same unbalanced audio.
Reducing Background Noise Through Environment and Settings
Even expensive interfaces can’t completely eliminate noise from loud environments. However, combining environmental improvements with proper settings creates significantly cleaner audio. Start by identifying your noise sources—computer fans, air conditioning, traffic, roommates—and address what you can control.
Position your microphone correctly relative to noise sources. Dynamic microphones reject sound from the sides and rear, so point the rear toward your computer. Condenser microphones generally capture more room sound, which might require acoustic treatment—even simple solutions like moving blankets or acoustic foam panels help.
Most streaming interfaces include noise gates in their processing sections. A noise gate automatically mutes your microphone when you’re not speaking, which eliminates background noise during silent periods. However, setting gates too aggressively causes your words to get cut off. Start with a gentle gate setting and increase the threshold gradually until background noise disappears without affecting your speech.
Final Thoughts: Choosing Your Streaming Audio Interface
After extensive testing with different streaming setups, the right interface depends entirely on your specific needs. Solo streamers benefit from simplified interfaces like the Elgato Wave XLR or Roland BRIDGE CAST, which provide professional results without complexity. These interfaces focus on what matters for single-person streams—clean voice audio, simple routing, and reliable performance.
Multi-guest streamers or podcasters require more inputs and flexible routing. The RØDE RØDECaster Pro II dominates this category with its complete ecosystem for broadcasting. Meanwhile, the Zoom AMS-24 serves users who need precise control over complex audio routing across multiple platforms.
Musicians who stream face different requirements. The PreSonus Revelator io44 balances recording capabilities with streaming features, making it ideal for performance-based content. The included Studio One software adds significant value for anyone editing content before uploa
ding.
Budget-conscious streamers should consider the IK Multimedia iRig Stream or Mackie MainStream. Both deliver surprisingly good audio quality at accessible prices. The iRig Stream adds mobile compatibility, perfect for streaming from changing locations. The MainStream focuses specifically on voice processing, making it ideal for talk-based content.
Above all, remember that audio quality matters more for retention than video quality. Viewers forgive lower-resolution video, but poor audio drives people away immediately. Investing in a proper streaming audio interface represents one of the most impactful upgrades you can make to your content.
Consider starting with an interface that matches your current needs but offers room to grow. Most interfaces in this guide work with professional XLR microphones, so you can upgrade your microphone later without replacing your interface. Additionally, as your channel grows and your requirements become more complex, you’ll understand exactly which features matter for your specific content.
FAQ
What's the difference between a streaming interface and a regular audio interface?
Streaming interfaces prioritize features for live broadcasting like hardware mute buttons, built-in voice processing, loopback audio, and multiple audio buses for separate stream and monitor mixes. Regular studio interfaces focus on recording quality and input count but often lack streaming-specific features that simplify live content creation.
Do I need an audio interface for streaming if I already have a USB microphone?
USB microphones work adequately for beginning streamers, but audio interfaces provide better sound quality, more control over your audio, and the flexibility to upgrade microphones without replacing your entire setup. If you’re serious about streaming, an interface with an XLR microphone will deliver noticeably better results than even expensive USB microphones.
Can I use my audio interface for streaming with OBS and Discord simultaneously?
For streaming, 48kHz sample rate works perfectly and matches what platforms like Twitch and YouTube support. Higher sample rates like 96kHz or 192kHz offer no practical benefit for streaming since platforms compress your audio anyway. However, if you also use your interface for music recording, higher sample rates provide more flexibility during editing.
How important is the sample rate for streaming audio interfaces?
Thanks to the high-quality preamps and Z-TONE impedance control, you typically won’t need a DI box with these interfaces. However, you might still want one for specific tonal characteristics or extremely long cable runs.
What's loopback audio and why do streamers need it?
Loopback audio captures your computer’s output—music, game sounds, desktop audio—and feeds it back into your interface as an input. This enables you to stream desktop audio without virtual audio cables or complex routing software. Most dedicated streaming interfaces include loopback functionality because it’s essential for professional-sounding broadcasts that include music, sound effects, or gameplay audio.

