Discover what is phantom power in audio interfaces and why you need it. Learn how this invisible technology powers microphones and transforms sound recording.
Imagine you’re setting up your home studio, and suddenly you encounter a term that sounds both mysterious and technical: phantom power. In the world of audio recording, this seemingly magical concept is actually a crucial technology that powers many professional microphones and audio devices.
This guide will unravel the mysteries of phantom power, explaining everything from its basic principles to its practical applications.
1. What is Phantom Power 48v?
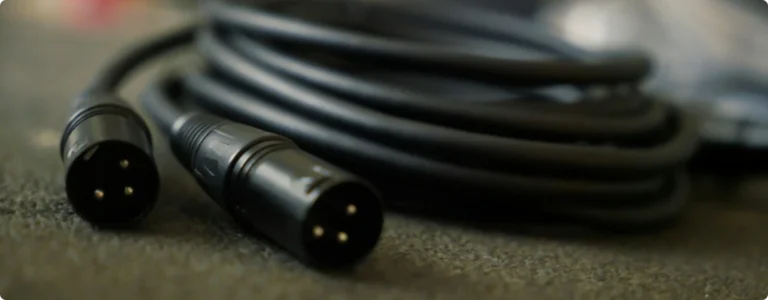
The phantom power definition is very straight forward, is an electrical method of transmitting direct current 48-volt (DC) through XLR microphone cables to power active electronic components in professional audio equipment. Surprisingly, it got its name because the power seems to be “phantom-like” – invisible and transmitted through the same cables used for audio signals.
Condenser microphones, known for their sensitivity and clarity, rely on phantom power to function. Without it, they won’t produce any sound.
In simple terms, phantom power is an electrical signal sent through an audio cable to power condenser. The audio signal travels through the same pins that carry phantom power. Without it, these microphones wouldn’t work.
Key Points About Phantom Power
- Provides 48 volts of direct current (DC)
- Travels through standard XLR cables
- Powers condenser microphones and active DI boxes
- Doesn’t affect the audio signal quality
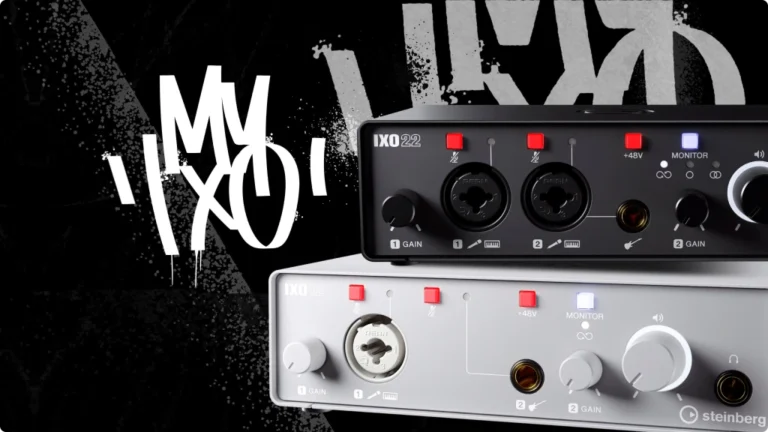
- Standard feature on professional audio interfaces
2. How Does Phantom Power Work
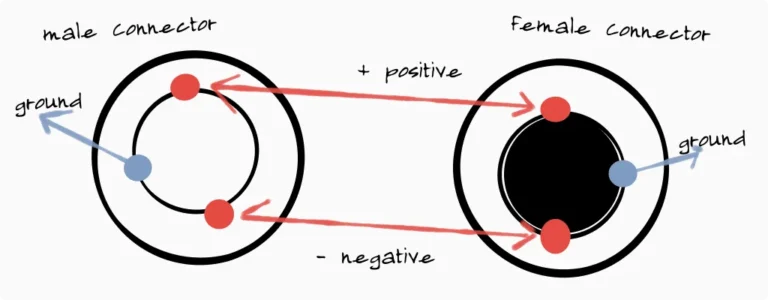
At its core, it operates on a simple but ingenious principle. It delivers a standard +48V DC voltage through the microphone cable, typically using balanced XLR connections.
Essentially, this means the same cable that carries your audio signal also provides the electrical power needed to run the microphone’s internal electronics.
The audio interface sends a 48V signal to the microphone. The condenser microphone uses this power to charge its internal diaphragm and circuitry. The mic sends the audio signal back to the interface through the same cable.
Technical Breakdown
- Voltage: Typically 48 volts (can vary between 11-52V)
- Transmission: Through pin 2 and pin 3 of an XLR cable
- Grounding: Pin 1 serves as the ground connection
This is efficient and eliminates the need for separate power sources.
This design is great because it allows the power and audio signals to run side by side without affecting each other. The balanced audio connection remains clean and noise-free, while the microphone receives its necessary power.
3. What is Phantom Power in Audio Interfaces

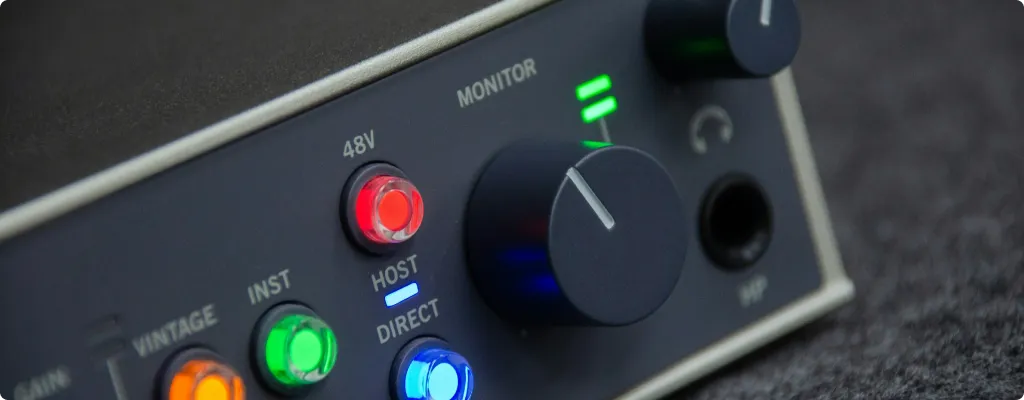
When you press the 48V button on your audio interface, you’re activating a sophisticated power delivery system. Inside the interface, a DC-DC converter transforms the device’s internal power supply voltage into the required 48 volts. This process involves several crucial components working together:
If you’re interested in the technical aspects of how phantom power works in audio interfaces, you can expand the sections below.
The Internal Circuit
Your audio interface contains several key components that work together to provide phantom power:
Power Supply Section:
- A DC-DC converter that steps up the voltage to 48V
- Voltage regulators that maintain stable power output
- Filtering capacitors that ensure clean power delivery
- Built-in safeguards against power fluctuations
Resistor Network:
- Precision 6.8kΩ resistors for consistent power delivery
- Balanced design to prevent audio interference
- Current limiting components for equipment protection
Power Distribution
Phantom power travels through your XLR cable in a specific way:
Pin Layout:
- Pin 1: Ground/Shield (0V)
- Pin 2: Hot (+48V)
- Pin 3: Cold (+48V)
Power Flow:
- Maximum 10mA current per channel
- Identical voltage on pins 2 and 3
- Clean ground path through pin 1
- Balanced power distribution for noise-free operation
Protection Mechanisms
Modern audio interfaces include several safety features to protect both your interface and connected equipment:
Safety Systems:
- Automatic current limiting
- Voltage spike protection
- Short circuit detection
- Temperature monitoring
- Emergency shutdown capabilities
Channel Management:
- Separate power for each XLR input
- Individual channel monitoring
- Independent switching circuits
- Cross-channel isolation
Practical Implementation
Here’s what is phantom power in real-world applications:
Signal Quality:
- Balanced voltage between pins 2 and 3
- Active noise filtering
- Ground loop prevention
- Clean power delivery
Power Management:
- Automatic voltage regulation
- Cable resistance compensation
- Load monitoring and adjustment
- Consistent power under varying conditions
Performance Features:
- Ultra-low noise operation
- Stable voltage output
- Clean power delivery
- Protection against power-related audio artifacts
In short, on most audio interfaces you will find a button or switch to activate phantom power. When activated, a current of 48V will power your condenser microphone and make it work.
4. Do Condenser Mics Need Phantom Power
Yes, particularly condenser microphones, require external power to function. Unlike dynamic microphones, which generate their own electrical signal through magnetic induction, condenser microphones need a constant electrical charge to operate.
5. Types of Microphones and Phantom Power
🎙️ Condenser Microphones
Converts sound waves into electrical signals using electrostatic principles. It consists of a diaphragm and a backplate that form a capacitor. When sound waves hit the diaphragm, it vibrates, causing variations in the distance between the diaphragm and the backplate, which alters capacitance. This change is then converted into an electrical voltage, allowing the microphone to capture sound accurately.
Since they contain actively powered electronics that require external power to function, they need phantom power. Here’s why:
- They use a thin, electrically-charged metal or plastic diaphragm
- The diaphragm needs constant polarization to function
- Internal preamp circuits require power to operate
- The active electronics enable their high sensitivity and detailed sound
🎤 Dynamic Microphones
Operate using electromagnetic induction. They consist of a diaphragm attached to a coil of wire, which moves within a magnetic field when sound waves hit it. This movement generates an electrical current, producing the audio signal.
Since dynamic microphones generate their own electrical energy and do not have any active electronic components that require external power, they function effectively without phantom power.
- Don’t need phantom power
- They use a moving coil attached to the diaphragm
- Sound waves create movement, generating electricity
- No active electronics means no power requirement
- More robust but generally less sensitive than condensers
Ribbon Microphones
Particularly passive models, also do not need phantom power because they operate similarly to dynamic microphones, relying on electromagnetic induction. They use a thin metal ribbon suspended in a magnetic field to capture sound.
The ribbon’s movement generates an electrical signal without the need for external power sources. However, it’s important to note that some active ribbon microphones, which contain built-in electronics for buffering and impedance matching, do require phantom power to function.
When working with ribbon microphones, follow these essential guidelines:
- Always check the manufacturer’s specifications before applying phantom power
- Give special consideration to vintage ribbon microphones – they almost never support phantom power
- Use high-quality preamps and audio interfaces with clean, stable phantom power implementation
- Wait several seconds after connecting cables before activating phantom power
- Keep your ribbon microphone’s manual handy for reference about power requirements
6. What is the Use of Phantom Power 48v
Understanding when to use phantom power is crucial for protecting your equipment and achieving the best possible sound quality. Let’s explore each scenario in detail, starting with devices that require phantom power. You’ll want to use it when:
Condenser Microphones
Condenser microphones are the most common devices requiring phantom power. These microphones contain active electronics that need external power to function. When you’re recording:
- Vocals in a studio setting
- Acoustic instruments like guitars or pianos
- Overhead drums for cymbal detail
- Podcasts or voiceovers
- Room ambience or environmental sounds
The phantom power energizes the condenser capsule and powers the internal preamp, allowing these microphones to capture the detailed, nuanced sound they’re known for.
Active DI Boxes
Active Direct Input (DI) boxes often require phantom power to operate their internal circuits. These devices are essential when you need to:
- Convert unbalanced instrument signals to balanced mic-level signals
- Match impedance between instruments and audio interfaces
- Drive long cable runs without signal loss
- Improve the sound of acoustic-electric instruments
Not all DI boxes need phantom power – passive models work without it. However, active DI boxes using phantom power often provide additional features like:
- Multiple input impedance options
- Signal buffering
- Enhanced headroom
- Built-in equalizers or filters
Modern (active) Ribbon Microphones
The relationship between ribbon microphones and phantom power has evolved significantly. Modern active ribbon microphones might require phantom power for:
- Internal preamp operation
- Impedance matching circuits
- Signal boosting
- Enhanced output capability
For example, microphones like the Royer R-122 or AEA A440 use phantom power to operate their active electronics while protecting their delicate ribbon elements with sophisticated circuitry.
In-line Microphone Preamps
These devices sit between your microphone and audio interface, providing:
- Additional gain for weak signals
- Impedance matching
- Tone shaping capabilities
- Signal boosting for long cable runs
Many in-line preamps rely on phantom power from your audio interface to function, effectively using the power to improve your signal before it reaches the main preamp.
7. When to Avoid Phantom Power
Understanding when not to use phantom power is equally important for protecting your equipment.
Vintage Ribbon Microphones
Older ribbon microphones are particularly vulnerable to phantom power because:
- They lack protection circuits found in modern designs
- Their ribbon elements can be permanently damaged by electrical current
- The transformers weren’t designed with phantom power in mind
- The internal wiring might not handle the voltage safely
Some classic models that should never receive phantom power include:
- RCA 44-BX
- Early Coles 4038
- Vintage Beyer M 160
- Original Bang & Olufsen ribbon models
Equipment Marked as Phantom Power Incompatible
Some audio devices explicitly warn against phantom power use because:
- Their internal circuits aren’t designed to handle the voltage
- They might have alternative power requirements
- The phantom power could interfere with their operation
- There’s a risk of internal component damage
Uncertain Compatibility Situations
When working with unfamiliar equipment:
- Always check the manufacturer’s documentation first
- Look for phantom power warnings on the device
- Research the specific model online
- Consult with other audio professionals if needed
8. Phantom Power in Mobile Recording: iOS and iPad Considerations
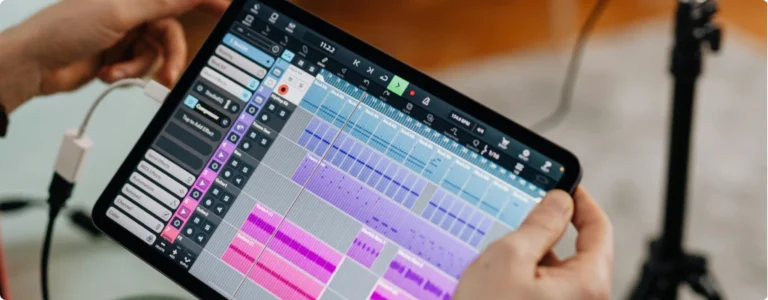
The rise of mobile recording has brought new considerations for phantom power usage, particularly when working with iOS devices like iPads and iPhones. Understanding these limitations helps you make informed decisions about your mobile recording setup.
Power Dynamics in Mobile Audio Interfaces
When you connect a bus-powered audio interface to an iOS device, you’re entering a complex world of power management. Think of your iPad or iPhone as having a limited power budget – like a small battery-powered generator trying to power a house. This power needs to be shared between the device itself, the audio interface, and any phantom power requirements.
The relationship between your iOS device and audio interface involves several important factors.
First, bus-powered interfaces draw their power directly from your iOS device through the connection port. This means your iPad or iPhone must supply enough power not only to operate the interface but also to generate the 48 volts needed for phantom power. It’s like trying to run both your house lights and a power-hungry appliance from that same small generator – sometimes there just isn’t enough power to go around.
Interface Compatibility and Power Requirements
Different audio interfaces handle this power limitation in various ways. Some interfaces, like the MOTU M2 and Apogee Duet 3, have been engineered to efficiently manage power draw and can successfully provide phantom power when connected to devices like the iPad Pro.
These interfaces use sophisticated power management systems to balance the available power effectively.
However, many other interfaces struggle with this power equation. The challenge comes from trying to generate 48 volts of phantom power from a device that typically operates on much lower voltages. This voltage conversion requires additional energy, which may exceed what your iOS device can safely provide.
Solutions for Mobile Recording
To ensure reliable phantom power in mobile recording situations, consider these approaches:
External Power Sources
- Use an external battery pack designed for audio interfaces
- Connect to AC power when possible
- Employ powered USB hubs that can provide additional current
Interface Selection
- Choose interfaces specifically designed for iOS compatibility
- Look for models with efficient power management
- Consider interfaces with their own battery power options
Power Management Strategies
- Use low-power microphones when possible
- Record critical takes when connected to external power
- Keep backup battery packs ready for extended sessions
Best Practices for Mobile Recording
When recording with iOS devices and phantom power, follow these guidelines:
- Check your interface’s specifications carefully before purchasing
- Test the phantom power capability with your specific iOS device
- Always carry backup power solutions for critical recording sessions
- Monitor your iOS device’s battery level during recording
- Consider using dynamic microphones for mobile recording when possible
Remember that just because an interface works with your iOS device doesn’t guarantee it can provide reliable phantom power. Think of it like a car engine – just because it runs doesn’t mean it can handle steep hills. Always verify the specific capabilities of your setup before committing to an important recording session.
9. Common Issues and Troubleshooting
While phantom power 48v is generally safe, there are some important considerations:
- Noise or Hum: If you experience noise, ensure your cables and connectors are in good condition. Poor shielding can cause interference.
- Mic Not Working: Double-check that phantom power is enabled on your interface.
- Compatibility Issues: Some microphones may require a different voltage (e.g., 12V or 24V). Verify your mic’s requirements before connecting it to an interface.
👉 Key Takeaway:
- Always check your microphone’s specifications
- Turn down audio interface volume before switching
- Avoid connecting/disconnecting during active power
- Some vintage or passive microphones can be damaged
10. Best Practices for Using Phantom Power
Following these guidelines will help protect your equipment and ensure optimal performance:
Connection Sequence
- Connect all cables before enabling phantom power
- Keep channel volumes down during power activation
- Wait several seconds after enabling phantom power
- Gradually raise channel volumes
Disconnection Sequence
- Lower all channel volumes
- Disable phantom power
- Wait for voltage to dissipate (about 10 seconds)
- Disconnect cables
Regular Maintenance
- Check cables for proper wiring and damage
- Monitor phantom power voltage levels
- Clean connection points regularly
- Test phantom power circuits periodically
Remember that phantom power is an essential tool in modern audio recording, but it must be used thoughtfully and carefully to protect your valuable equipment and ensure optimal performance.
11. Best Audio Interfaces with Phantom Power
Most audio interfaces have phantom power for condenser mics. It’s an essential feature, and as discussed in this article, there’s no mystery to it. If you’re in the market for a reliable phantom-powered interface, here are some top picks:
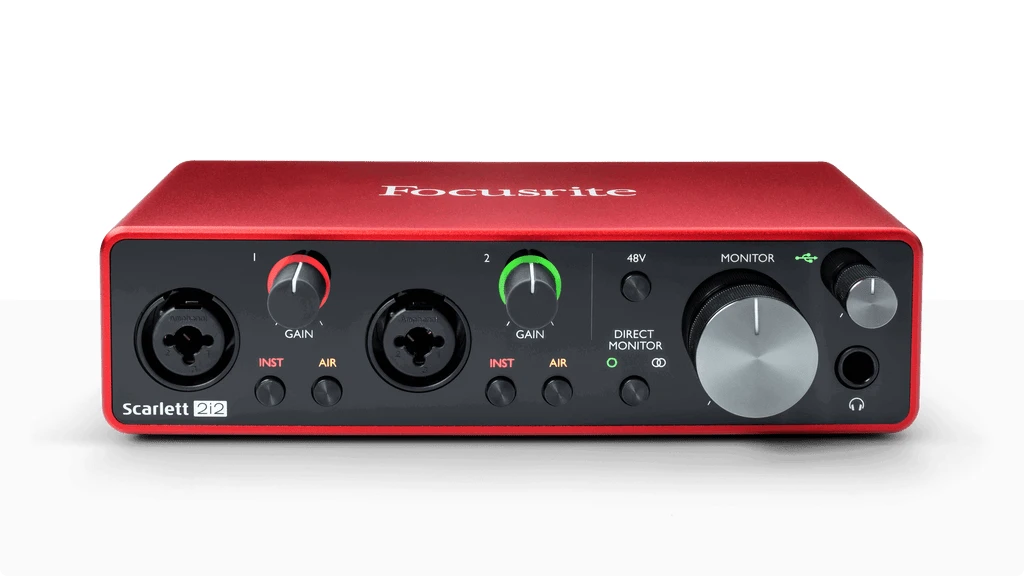
Focusrite Scarlett 2i2 (3rd Gen)
- Features switchable 48V phantom power supply.
- Perfect for home studios and beginner podcasters.
Read Full Review
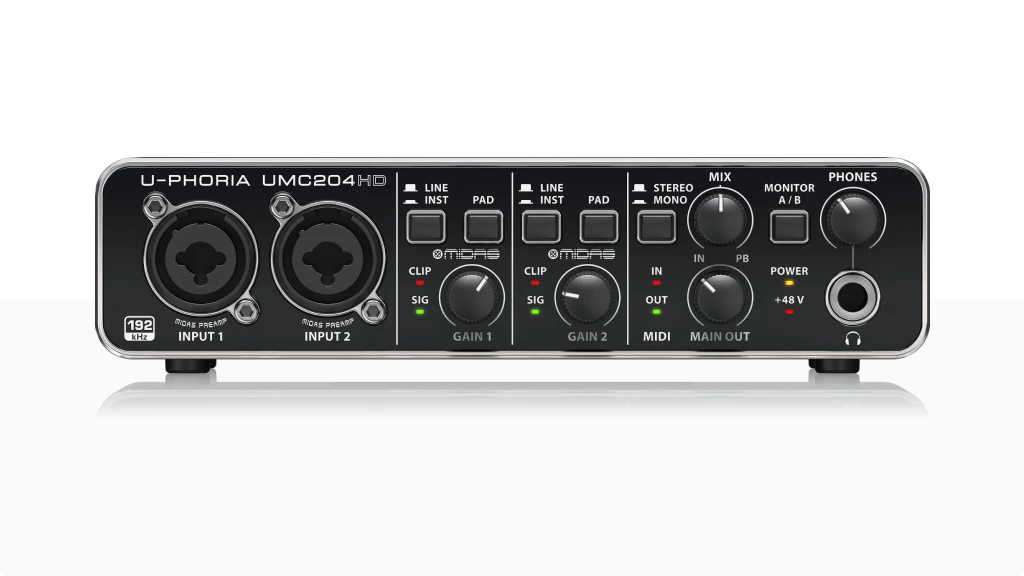
Behringer U-Phoria UMC204HD
- Affordable with dual phantom powered XLR inputs.
Read Full Review
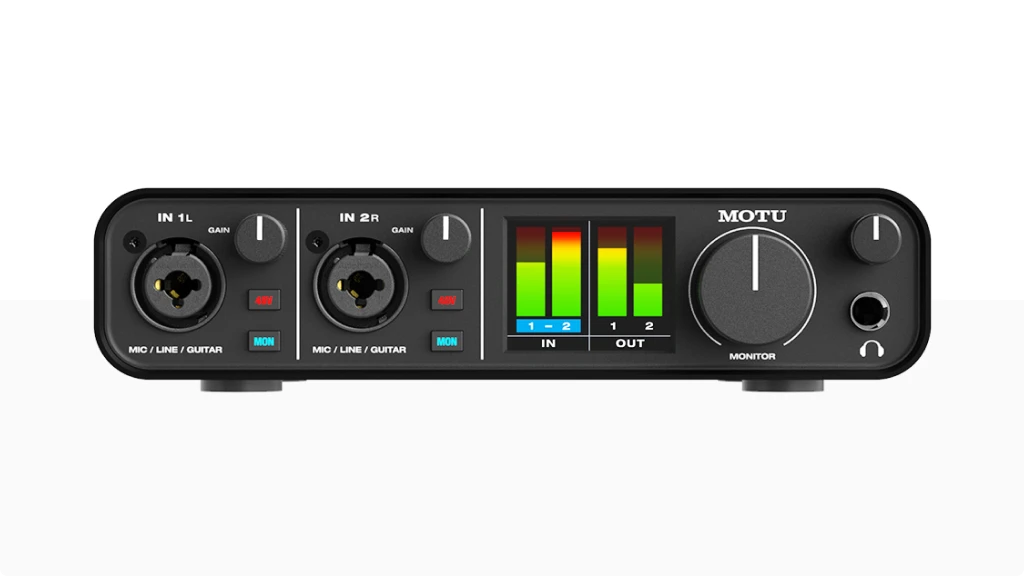
MOTU M2
- Premium build quality with accurate phantom power for mic.
- Individual phantom power switches to control which inputs receive power.
Read Full Review
Universal Audio Volt 2
- Combines 48 volt phantom power with vintage mic preamp emulation.

Read Full Review
12. Conclusion: What is Phantom Power Demystified
Phantom power is a cornerstone of modern audio recording, enabling condenser microphones to deliver the clarity and detail they’re known for.
Understanding it transforms your approach to audio recording. What once seemed like a complex technical concept is now a clear, manageable technology that opens up new possibilities for sound capture.
10. FAQ
How do I enable phantom power on my audio interface?
Most interfaces have a dedicated 48V switch or button in the front or rear panel for enabling phantom power, you probably will find it easily, if you don’t, check your user manual for specifics.
Can it Phantom Power Damage My Microphone?
Most modern microphones are designed to be phantom power compatible. However, always consult your specific microphone’s manual to ensure safe usage.
Do All Audio Interfaces Provide Phantom Power?
Not all interfaces offer phantom power. Professional and semi-professional audio interfaces typically include this feature, while basic interfaces might not.
How Do I Know If My Microphone Needs Phantom Power?
Check the microphone’s specifications. Condenser microphones almost always require phantom power, while dynamic microphones typically do not.
Is Phantom Power the Same Worldwide?
While the standard phantom power voltage is +48V, some equipment might use slightly different voltages. International standards generally maintain consistency.
Can I Use it with Battery-Powered Microphones?
Generally, no. Battery-powered microphones have their own power source and do not require it.

